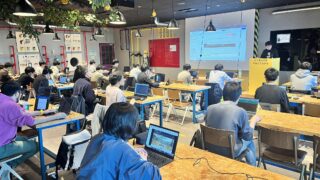
どうも、のみぞうです。久しぶりにWriteUp書きます。来月参加するHardening本戦の準備に役に立つのではないかと思ってちょっとやってみた。今年こそ技術班として黒い画面をガチャガチャやる役割を担いたいんや。
https://tryhackme.com/room/linuxsystemhardening
英語の翻訳は自力でやるのを諦めてGoogle翻訳に丸投げなので間違ってたらごめん。
Hardeningって何?って人にはオススメ本があります
https://nomizone.booth.pm/items/4960641
Task 1 Introduction
No answer needed
Task 2 Physical Security
いきなりフィジカルからはじまるので拍子抜けした。でもまあそんなもんか。“boot access = root access” と言われるらしい。なんか深い。
GNU GRUB2のブートローダーのパスワード機能は、起動時のGRUBメニューエントリーへのアクセスを制限するためのもの。
What command can you use to create a password for the GRUB bootloader?
GRUB ブートローダーのパスワードを作成するにはどのコマンドを使用できますか?
grub2-mkpasswd-pbkdf2
What does PBKDF2 stand for?
PBKDF2は何の略ですか?
Password-Based Key Derivation Function 2
Task 3 Filesystem Partitioning and Encryption
ディスクの暗号化の話
What does LUKS stand for?
LUKSは何の略ですか?
Linux Unified Key Setup
なんだって略称を答えさせるんだこのルーム…めんどい…
We cannot attach external storage to the VM, so we have created a /home/tryhackme/secretvault.img file instead. It is encrypted with the password 2N9EdZYNkszEE3Ad. To access it, you need to open it using cryptsetup and then mount it to an empty directory, such as myvault. What is the flag in the secret vault?
外部ストレージを VM に接続できないため、代わりにファイルを作成しました(/home/tryhackme/secretvault.img)2N9EdZYNkszEE3Adというパスワードで暗号化しています。これにアクセスするには、cryptsetupを使用してmyvaultなどのディレクトリにマウントする必要があります。フラグはなんですか?
英語何言ってるかわかんないけど、要するに復号して中を読めってことだと思うので調べながらやった。
# sudoをつけてcryptsetupを実行
sudo cryptsetup luksOpen /home/tryhackme/secretvault.img myvault

# パスワードを求められるので入力
2N9EdZYNkszEE3Ad

# 空のディレクトリ(例:myvault_dir)を作成
mkdir myvault_dir

# マウントする
sudo mount /dev/mapper/myvault myvault_dir

# マウントしたディレクトリ移動する
cd myvault_dir

# ls と cat でフラグを探す。
THM{LUKS_not_LUX}
Task4 Firewall
Firewallの話。やっとHardeningで役立ちそうな話になってきたぞ。
iptables
現在の設定を確認してみたものの。見づらすぎて途方にくれる
# 今のiptablesの設定を確認
tryhackme@ip-10-10-48-102:~$ sudo iptables -L -v -n
Chain INPUT (policy DROP 0 packets, 0 bytes)
 pkts bytes target     prot opt in     out     source               destination
 2025  184K ufw-before-logging-input  all  --  *      *       0.0.0.0/0            0.0.0.0/0
 2025  184K ufw-before-input  all  --  *      *       0.0.0.0/0            0.0.0.0/0
    0     0 ufw-after-input  all  --  *      *       0.0.0.0/0            0.0.0.0/0
    0     0 ufw-after-logging-input  all  --  *      *       0.0.0.0/0            0.0.0.0/0
    0     0 ufw-reject-input  all  --  *      *       0.0.0.0/0            0.0.0.0/0
    0     0 ufw-track-input  all  --  *      *       0.0.0.0/0            0.0.0.0/0

Chain FORWARD (policy DROP 0 packets, 0 bytes)
 pkts bytes target     prot opt in     out     source               destination
    0     0 ufw-before-logging-forward  all  --  *      *       0.0.0.0/0            0.0.0.0/0
    0     0 ufw-before-forward  all  --  *      *       0.0.0.0/0            0.0.0.0/0
    0     0 ufw-after-forward  all  --  *      *       0.0.0.0/0            0.0.0.0/0
    0     0 ufw-after-logging-forward  all  --  *      *       0.0.0.0/0            0.0.0.0/0
    0     0 ufw-reject-forward  all  --  *      *       0.0.0.0/0            0.0.0.0/0
    0     0 ufw-track-forward  all  --  *      *       0.0.0.0/0            0.0.0.0/0

Chain OUTPUT (policy ACCEPT 0 packets, 0 bytes)
 pkts bytes target     prot opt in     out     source               destination
 2064  235K ufw-before-logging-output  all  --  *      *       0.0.0.0/0            0.0.0.0/0
 2064  235K ufw-before-output  all  --  *      *       0.0.0.0/0            0.0.0.0/0
  531 34082 ufw-after-output  all  --  *      *       0.0.0.0/0            0.0.0.0/0
  531 34082 ufw-after-logging-output  all  --  *      *       0.0.0.0/0            0.0.0.0/0
  531 34082 ufw-reject-output  all  --  *      *       0.0.0.0/0            0.0.0.0/0
  531 34082 ufw-track-output  all  --  *      *       0.0.0.0/0            0.0.0.0/0
<後略>
解説に、設定する時は最初にiptables -F をつけて元々の設定をフラッシュさせることが必要です。って書いてあったので、なるほどーと思って何も考えずにコマンド打ったら二度と接続できなくなってマシンを再起動しました。ひどい罠だ。どういうことやねん。
親切なきとーさんが解説してくれました
There is a firewall running on the Linux VM. It is allowing port 22 TCP as we can ssh into the machine. It is allowing another TCP port; what is it?
nux VM 上でファイアウォールが実行されています。マシンに SSH 接続できるため、ポート 22 TCP が許可されています。別の TCP ポートを許可しています。それは何ですか?
見づらいのでufw使えるなら使う。22番以外に開いてるポートを答える。
tryhackme@ip-10-10-48-102:~$ sudo ufw status
Status: active

To                         Action      From
--                         ------      ----
22/tcp                     ALLOW       Anywhere
14298/udp                  ALLOW       Anywhere
12526/tcp                  ALLOW       Anywhere
22/tcp (v6)                ALLOW       Anywhere (v6)
14298/udp (v6)             ALLOW       Anywhere (v6)
12526/tcp (v6)             ALLOW       Anywhere (v6)
結果より回答、12526
What is the allowed UDP port?
許可される UDP ポートは何ですか?
同じく結果より、14298
Task 5 Remote Access
リモートアクセス環境はそれなりに危険があぶないんだぜって話(要約しすぎ)
解説に出てきたなかでHardeningでやるとよさそうなこと
- PermitRootLogin no
- rootログイン無効
- PubkeyAuthentication yes
- 公開鍵認証有効
- 全サーバに設定するのがだるいのとHardeningアカウントのためにパスワード認証は無効にできないので本当に競技中やるべきかは要審議だなあと思う(やってるチームもあるらしいね)
What flag is hidden in the sshd_config file?
なぜこんなところにフラグが…?
tryhackme@ip-10-10-189-198:~$ cat /etc/ssh/sshd_config
# THM{secure_SEA_shell}

#   $OpenBSD: sshd_config,v 1.103 2018/04/09 20:41:22 tj Exp $

# This is the sshd server system-wide configuration file.  See
# sshd_config(5) for more information.

# This sshd was compiled with PATH=/usr/bin:/bin:/usr/sbin:/sbin

# The strategy used for options in the default sshd_config shipped with
# OpenSSH is to specify options with their default value where
# possible, but leave them commented.  Uncommented options override the
# default value.

Include /etc/ssh/sshd_config.d/*.conf

#Port 22
#AddressFamily any
#ListenAddress 0.0.0.0
#ListenAddress ::

#HostKey /etc/ssh/ssh_host_rsa_key
#HostKey /etc/ssh/ssh_host_ecdsa_key
#HostKey /etc/ssh/ssh_host_ed25519_key

# Ciphers and keying
#RekeyLimit default none

# Logging
#SyslogFacility AUTH
#LogLevel INFO

# Authentication:

#LoginGraceTime 2m
#PermitRootLogin prohibit-password
#StrictModes yes
#MaxAuthTries 6
#MaxSessions 10

#PubkeyAuthentication yes

# Expect .ssh/authorized_keys2 to be disregarded by default in future.
#AuthorizedKeysFile     .ssh/authorized_keys .ssh/authorized_keys2

#AuthorizedPrincipalsFile none

#AuthorizedKeysCommand none
#AuthorizedKeysCommandUser nobody

# For this to work you will also need host keys in /etc/ssh/ssh_known_hosts
#HostbasedAuthentication no
# Change to yes if you don't trust ~/.ssh/known_hosts for
# HostbasedAuthentication
#IgnoreUserKnownHosts no
# Don't read the user's ~/.rhosts and ~/.shosts files
#IgnoreRhosts yes

# To disable tunneled clear text passwords, change to no here!
PasswordAuthentication yes
#PermitEmptyPasswords no

# Change to yes to enable challenge-response passwords (beware issues with
# some PAM modules and threads)
ChallengeResponseAuthentication no

# Kerberos options
#KerberosAuthentication no
#KerberosOrLocalPasswd yes
#KerberosTicketCleanup yes
#KerberosGetAFSToken no

# GSSAPI options
#GSSAPIAuthentication no
#GSSAPICleanupCredentials yes
#GSSAPIStrictAcceptorCheck yes
#GSSAPIKeyExchange no

# Set this to 'yes' to enable PAM authentication, account processing,
# and session processing. If this is enabled, PAM authentication will
# be allowed through the ChallengeResponseAuthentication and
# PasswordAuthentication.  Depending on your PAM configuration,
# PAM authentication via ChallengeResponseAuthentication may bypass
# the setting of "PermitRootLogin without-password".
# If you just want the PAM account and session checks to run without
# PAM authentication, then enable this but set PasswordAuthentication
# and ChallengeResponseAuthentication to 'no'.
UsePAM yes

#AllowAgentForwarding yes
#AllowTcpForwarding yes
#GatewayPorts no
X11Forwarding yes
#X11DisplayOffset 10
#X11UseLocalhost yes
#PermitTTY yes
PrintMotd no
#PrintLastLog yes
#TCPKeepAlive yes
#PermitUserEnvironment no
#Compression delayed
#ClientAliveInterval 0
#ClientAliveCountMax 3
#UseDNS no
#PidFile /var/run/sshd.pid
#MaxStartups 10:30:100
#PermitTunnel no
#ChrootDirectory none
#VersionAddendum none

# no default banner path
#Banner none

# Allow client to pass locale environment variables
AcceptEnv LANG LC_*

# override default of no subsystems
Subsystem       sftp    /usr/lib/openssh/sftp-server

# Example of overriding settings on a per-user basis
#Match User anoncvs
#       X11Forwarding no
#       AllowTcpForwarding no
#       PermitTTY no
#       ForceCommand cvs server
Task6 Securing User Accounts
ユーザーアカウントの保護。川口さんも一番重要だとおっしゃっていた。
ユーザー一覧の確認
tryhackme@ip-10-10-189-198:~$ cat /etc/passwd
root:x:0:0:root:/root:/bin/bash
daemon:x:1:1:daemon:/usr/sbin:/usr/sbin/nologin
bin:x:2:2:bin:/bin:/usr/sbin/nologin
sys:x:3:3:sys:/dev:/usr/sbin/nologin
sync:x:4:65534:sync:/bin:/bin/sync
games:x:5:60:games:/usr/games:/usr/sbin/nologin
man:x:6:12:man:/var/cache/man:/usr/sbin/nologin
lp:x:7:7:lp:/var/spool/lpd:/usr/sbin/nologin
mail:x:8:8:mail:/var/mail:/usr/sbin/nologin
news:x:9:9:news:/var/spool/news:/usr/sbin/nologin
uucp:x:10:10:uucp:/var/spool/uucp:/usr/sbin/nologin
proxy:x:13:13:proxy:/bin:/usr/sbin/nologin
www-data:x:33:33:www-data:/var/www:/usr/sbin/nologin
backup:x:34:34:backup:/var/backups:/usr/sbin/nologin
list:x:38:38:Mailing List Manager:/var/list:/usr/sbin/nologin
irc:x:39:39:ircd:/var/run/ircd:/usr/sbin/nologin
gnats:x:41:41:Gnats Bug-Reporting System (admin):/var/lib/gnats:/usr/sbin/nologin
nobody:x:65534:65534:nobody:/nonexistent:/usr/sbin/nologin
systemd-network:x:100:102:systemd Network Management,,,:/run/systemd:/usr/sbin/nologin
systemd-resolve:x:101:103:systemd Resolver,,,:/run/systemd:/usr/sbin/nologin
systemd-timesync:x:102:104:systemd Time Synchronization,,,:/run/systemd:/usr/sbin/nologin
messagebus:x:103:106::/nonexistent:/usr/sbin/nologin
syslog:x:104:110::/home/syslog:/usr/sbin/nologin
_apt:x:105:65534::/nonexistent:/usr/sbin/nologin
tss:x:106:111:TPM software stack,,,:/var/lib/tpm:/bin/false
uuidd:x:107:112::/run/uuidd:/usr/sbin/nologin
tcpdump:x:108:113::/nonexistent:/usr/sbin/nologin
sshd:x:109:65534::/run/sshd:/usr/sbin/nologin
landscape:x:110:115::/var/lib/landscape:/usr/sbin/nologin
pollinate:x:111:1::/var/cache/pollinate:/bin/false
ec2-instance-connect:x:112:65534::/nonexistent:/usr/sbin/nologin
systemd-coredump:x:999:999:systemd Core Dumper:/:/usr/sbin/nologin
ubuntu:x:1000:1000:Ubuntu:/home/ubuntu:/bin/bash
lxd:x:998:100::/var/snap/lxd/common/lxd:/bin/false
fwupd-refresh:x:113:119:fwupd-refresh user,,,:/run/systemd:/usr/sbin/nologin
tryhackme:x:1001:1001:Try Hack Me User,31337,,:/home/tryhackme:/bin/bash
blacksmith:x:1002:1002::/home/blacksmith:/bin/sh
goldsmith:x:1003:1003::/home/goldsmith:/bin/sh
smith:x:1004:1004::/home/smith:/bin/sh
carpenter:x:1005:1005::/home/carpenter:/bin/sh
sudo権限を持ってるユーザー一覧を確認してみる
tryhackme@ip-10-10-189-198:~$ sudo cat /etc/sudoers
#
# This file MUST be edited with the 'visudo' command as root.
#
# Please consider adding local content in /etc/sudoers.d/ instead of
# directly modifying this file.
#
# See the man page for details on how to write a sudoers file.
#
Defaults        env_reset
Defaults        mail_badpass
Defaults        secure_path="/usr/local/sbin:/usr/local/bin:/usr/sbin:/usr/bin:/sbin:/bin:/snap/bin"

# Host alias specification

# User alias specification

# Cmnd alias specification

# User privilege specification
root    ALL=(ALL:ALL) ALL

# Members of the admin group may gain root privileges
%admin ALL=(ALL) ALL

# Allow members of group sudo to execute any command
%sudo   ALL=(ALL:ALL) ALL

# See sudoers(5) for more information on "#include" directives:

#includedir /etc/sudoers.d
RedHat系のLinuxディストリビューションでは、通常「wheel」グループが sudo の許可を持っています、とのこと。
Hardeningでやったほうが良さそうなこと。
- ユーザー棚卸し
- 資料に載ってないユーザーはいないか?
- rootユーザーのログイン無効
- 使わないアカウント無効
やり方を確認していく
# rootログインや不要アカウントの無効化
sudo vi /etc/passwd

# 無効にしたいユーザーの行を書き換える
# 行の最後にある /bin/bash ってところを /usr/sbin/nologin とか /sbin/nologin とかに変更
root:x:0:0:root:/root:/usr/sbin/nologin
daemon:x:1:1:daemon:/usr/sbin:/usr/sbin/nologin
bin:x:2:2:bin:/bin:/usr/sbin/nologin
…以下略

# 再起動は不要
# 既にログインしているセッションには影響を与えない。新たに root でログインしようとすると、/sbin/nologin によってログイン拒否ローカルサービスアカウント(例:www-data, mongo, nginx など)にも適用できます。これらのサービスはシステム上で動作するためにアカウントが必要ですが、インタラクティブなログインは必要ありません。/sbin/nologin に設定することで、リモートコード実行(RCE)の脆弱性があった場合でも、少なくともインタラクティブなログインは防げます。
という説明があるので、このへんの設定もちゃんと見たほうがいいんだろうなと思った。この章はちょっと勉強になった。
One way to disable an account is to edit the passwd file and change the account’s shell. What is the suggested value to use for the shell?
アカウントを無効にする一つの方法は、passwdファイルを編集してアカウントのシェルを変更することです。シェルに使用する推奨値は何ですか?
これはさっきからやってるやつ
/sbin/nologin
What is the name of the RedHat and Fedora systems sudoers group?
RedHatとFedoraシステムのsudoersグループの名前は何ですか?
wheel
What is the name of the sudoers group on Debian and Ubuntu systems?
Debian および Ubuntu システム上の sudoers グループの名前は何ですか?
sudo
Other than tryhackme and ubuntu, what is the username that belongs to the sudoers group?
tryhackmeとubuntu以外で、sudoersグループに所属しているユーザー名は何ですか?
sudoグループを見ればよい
tryhackme@ip-10-10-189-198:~$ cat /etc/group | grep sudo
sudo:x:27:ubuntu,tryhackme,blacksmith
結果より、blacksmith
Task7 Software and Services
不要なサービスを無効にしろとか、不要なポートをブロックしろとか書いてある。わかるけど…その不要って具体的にどういうものなのかわかんないんじゃい…とモヤモヤした気持ちになる章
Besides FTPS, what is another secure replacement for TFTP and FTP?
FTPS のほかに、TFTP と FTP の安全な代替手段は何ですか?
SFTP
CTFではFTPばっかり出てくるけど実際もう使われてないのかなあ
Task 8 Update and Upgrade Policies
バージョンアップは大事だよ、って章。わかるけどHardeningではなかなかできなかったりする。
What command would you use to update an older Red Hat system?
古い Red Hat システムを更新するにはどのコマンドを使用しますか?
yum update
What command would you use to update a modern Fedora system?
最新の Fedora システムを更新するにはどのコマンドを使用しますか?
dnf update
What two commands are required to update a Debian system? (Connect the two commands with &&.)
Debian システムを更新するために必要な 2 つのコマンドは何ですか? (2 つのコマンドを && で接続します。)
apt update && apt upgrade
What does yum stand for?
yumとは何の略ですか?
Yellowdog Updater, Modified
今まで何の略かなんて気にしたことなかったなあ…イエロードッグって何…
What does dnf stand for?
dnfとは何の略ですか
Dandified Yum
What flag is hidden in the sources.list file?
sources.listファイルにはどのようなフラグが隠されていますか?
ソースリストまじまじと見たことがなかった。へえ。
tryhackme@ip-10-10-189-198:~$ cat /etc/apt/sources.list
# THM{not_Advanced_Persistent_Threat}

## Note, this file is written by cloud-init on first boot of an instance
## modifications made here will not survive a re-bundle.
## if you wish to make changes you can:
## a.) add 'apt_preserve_sources_list: true' to /etc/cloud/cloud.cfg
##     or do the same in user-data
## b.) add sources in /etc/apt/sources.list.d
## c.) make changes to template file /etc/cloud/templates/sources.list.tmpl

# See http://help.ubuntu.com/community/UpgradeNotes for how to upgrade to
# newer versions of the distribution.
deb http://eu-west-1.ec2.archive.ubuntu.com/ubuntu/ focal main restricted
# deb-src http://eu-west-1.ec2.archive.ubuntu.com/ubuntu/ focal main restricted

## Major bug fix updates produced after the final release of the
## distribution.
deb http://eu-west-1.ec2.archive.ubuntu.com/ubuntu/ focal-updates main restricted
# deb-src http://eu-west-1.ec2.archive.ubuntu.com/ubuntu/ focal-updates main restricted

## N.B. software from this repository is ENTIRELY UNSUPPORTED by the Ubuntu
## team. Also, please note that software in universe WILL NOT receive any
## review or updates from the Ubuntu security team.
deb http://eu-west-1.ec2.archive.ubuntu.com/ubuntu/ focal universe
# deb-src http://eu-west-1.ec2.archive.ubuntu.com/ubuntu/ focal universe
deb http://eu-west-1.ec2.archive.ubuntu.com/ubuntu/ focal-updates universe
# deb-src http://eu-west-1.ec2.archive.ubuntu.com/ubuntu/ focal-updates universe

## N.B. software from this repository is ENTIRELY UNSUPPORTED by the Ubuntu
## team, and may not be under a free licence. Please satisfy yourself as to
## your rights to use the software. Also, please note that software in
## multiverse WILL NOT receive any review or updates from the Ubuntu
## security team.
deb http://eu-west-1.ec2.archive.ubuntu.com/ubuntu/ focal multiverse
# deb-src http://eu-west-1.ec2.archive.ubuntu.com/ubuntu/ focal multiverse
deb http://eu-west-1.ec2.archive.ubuntu.com/ubuntu/ focal-updates multiverse
# deb-src http://eu-west-1.ec2.archive.ubuntu.com/ubuntu/ focal-updates multiverse

## N.B. software from this repository may not have been tested as
## extensively as that contained in the main release, although it includes
## newer versions of some applications which may provide useful features.
## Also, please note that software in backports WILL NOT receive any review
## or updates from the Ubuntu security team.
deb http://eu-west-1.ec2.archive.ubuntu.com/ubuntu/ focal-backports main restricted universe multiverse
# deb-src http://eu-west-1.ec2.archive.ubuntu.com/ubuntu/ focal-backports main restricted universe multiverse

## Uncomment the following two lines to add software from Canonical's
## 'partner' repository.
## This software is not part of Ubuntu, but is offered by Canonical and the
## respective vendors as a service to Ubuntu users.
# deb http://archive.canonical.com/ubuntu focal partner
# deb-src http://archive.canonical.com/ubuntu focal partner

deb http://security.ubuntu.com/ubuntu focal-security main restricted
# deb-src http://security.ubuntu.com/ubuntu focal-security main restricted
deb http://security.ubuntu.com/ubuntu focal-security universe
# deb-src http://security.ubuntu.com/ubuntu focal-security universe
deb http://security.ubuntu.com/ubuntu focal-security multiverse
# deb-src http://security.ubuntu.com/ubuntu focal-security multiverse
Task 9 Audit and Log Configuration
ログの話。興味はあるけどなんとなく苦手意識がある。プロからしたら初歩すぎて笑っちゃうんだろうけどこちとら初心者なので真面目に解説を読む。
Linuxシステムのほとんどのログファイルは /var/log ディレクトリに保存されています。脅威調査のための主要なログ
/var/log/messages(一般ログ)/var/log/auth.log(認証ログ、Debian系)/var/log/secure(認証ログ、Red HatとFedora系)など
マシンの中を見てみたけどauth.log以外なかった…うそつき…
tryhackme@ip-10-10-189-198:/var/log$ ls
alternatives.log    auth.log    cloud-init-output.log  dmesg.0     dmesg.4.gz  kern.log    private      ubuntu-advantage-timer.log    unattended-upgrades
alternatives.log.1  auth.log.1  cloud-init.log         dmesg.1.gz  dpkg.log    kern.log.1  syslog       ubuntu-advantage-timer.log.1  wtmp
amazon              btmp        dist-upgrade           dmesg.2.gz  dpkg.log.1  landscape   syslog.1     ubuntu-advantage.log
apt                 btmp.1      dmesg                  dmesg.3.gz  journal     lastlog     syslog.2.gz  ubuntu-advantage.log.1
大きなログファイルを扱うための便利なコマンド
# 最後の12行を表示
tail -n 12 boot.log

# 「FAILED」というキーワードが含まれる行を検索
grep FAILED boot.log
ログファイルを見るためには、rootユーザーとしてログインするか、コマンドの前に sudo をつける必要がある
What command can you use to display the last 15 lines of kern.log?
kern.logで最後の15 行を表示するにはどのようなコマンドを使用できますか?
tail -n 15 kern.log
What command can you use to display the lines containing the word denied in the file secure?
denied ファイル内に「secure」という単語を含む行を表示するには、どのコマンドを使用できますか?
grep denied secure
Task 10 Conclusion and Final Notes
文書化は大事だぞ!!記録に残せよ!ってことが書いてある。わかっては…いる…
No answer needed
まとめ
これさえやってればHardening本戦で戦えるってほどではないんだけど、Linuxの操作に不安があるとかなら1回やってみると良いのかもしれない。超々々々々基本的なことしか書いてないけど。